123-3D - 3D Printers and 3D filament - Homepage logo
 1000's products available for Next Day Delivery
 Lowest Price Guarantee
 3D Experts on hand to help
T: 0333 325 0011
E: info@123-3D.co.uk
Free delivery over £30

Shopping cart

Quantity Product
No products
Total: £0.00
(Incl. 0% VAT)
  • Home
  • Over-extrusion: my 3D prints show an uneven surface

Over-extrusion: my 3D prints show an uneven surface

3D Printing Help Centre

3D PRINTING HELP CENTRE

In the 123-3D help centre, we answer all your questions about 3D software and printer settings, problems you may experience during or after 3D printing and other 3D-related topics.

Over-extrusion: my 3D prints show an uneven surface

Do your 3D prints look sloppy and have unevenness on the surface or on the sides? Then you most likely suffer from over-extrusion. This is the phenomenon that occurs when too much filament is pressed out of the nozzle during 3D printing. Over-extrusion is usually caused by a combination of incorrect settings and is easy to fix. 

How do you recognise over-extrusion?

Before you can solve this common problem, it is important that you recognise the various symptoms of over-extrusion. Your 3D printer suffers from this problem if your 3D prints show the following external characteristics:
 
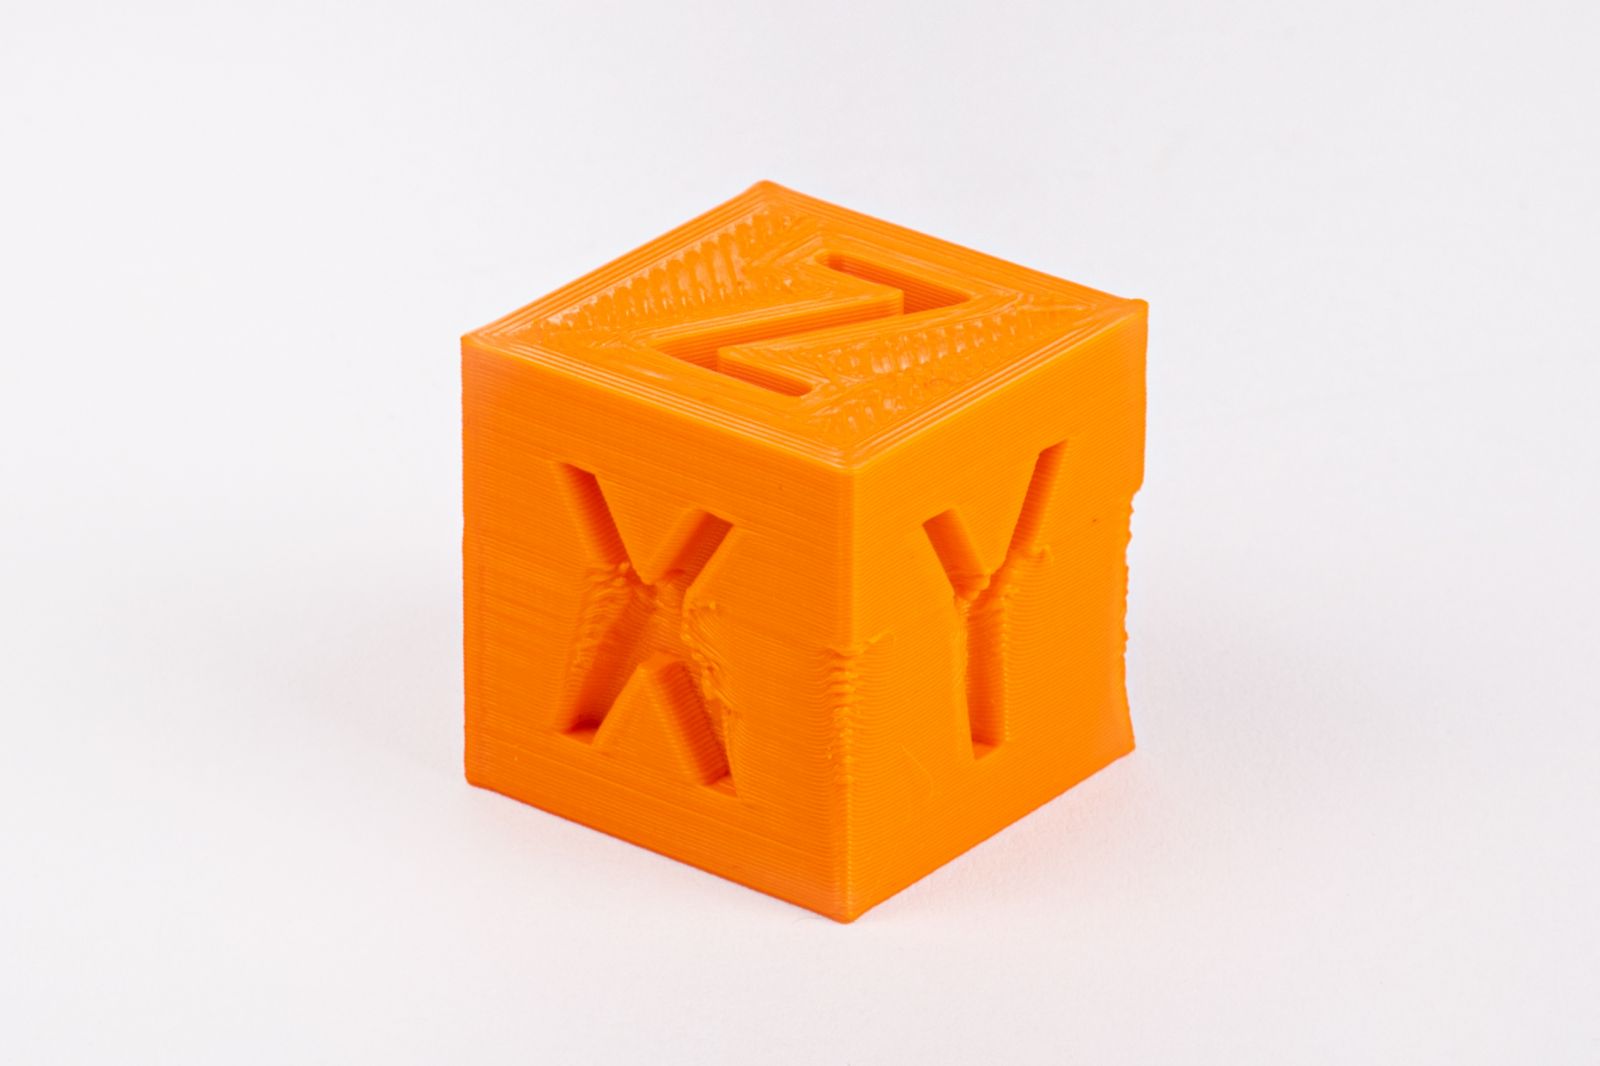
The 3D print is out of proportion
Your 3D print is out of proportion when the shape and dimensions deviate from your design. In addition, your design may look 'slumped', as if the structure has collapsed under the weight of the material or any heat from the outside.
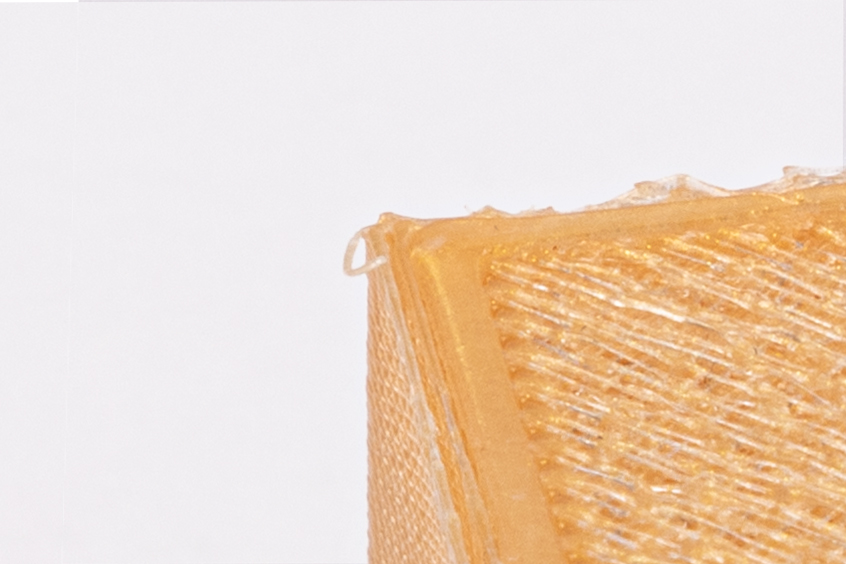
The print lines are thick and bumpy
Normally the print lines of your 3D print should be tight and almost invisible. Test this by printing a cube with at least 3 outlines. Does it look like too many layers have been printed or are there drips on the side of the model? Then you suffer from over-extrusion.
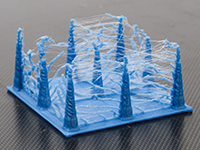
The 3D print appears to be shrouded in a kind of 'spider web'
If too much filament is used during printing, the nozzle will leak, causing 'stringing' or 'oozing'. This creates thin wires between the different parts of your print.
 

How can you solve or prevent over-extrusion?

Over-extrusion can have several causes. That is why we have made an overview with important points for attention and the most common causes and solutions. 
  • Calibrate your extruder's e-steps

Check that the extruder is feeding the correct amount of filament by marking the filament at two points: at 100mm and at 120mm. Check the current settings of the e-steps (steps/mm) in your 3D software by typing 'M501' in the 'communication' field and looking for the value indicated as follows: EXXX.XX. Then set the speed and length at which you want to extrude (in the slicer software). Press the extruder button and measure the actual filament throughput by measuring the distance to the first mark.

Fill in all variables with the following formula:
  1. 'Steps / mm' x 'length' = 'X'
  2. 'X' / actual length of the fed filament = new steps/mm
Does the result deviate from the current steps/mm? Adjust your settings to the new value so that you no longer suffer from over-extrusion.
  • No extrusion multiply settings

Make sure that the extrusion multiplier settings in your 3D slicer software are always on so that the right amount of filament is pushed through the nozzle. Do you often suffer from a clogged nozzle or too thick (overlapping) layers? Then these settings are probably off.
  • Adjust the flow rate

The optimal 'flow rate' differs per filament type and can easily be adjusted in your slicer software. Do you suffer from stringing due to over-extrusion? Decrease the flow rate in 5% increments until you have achieved the best result.
  • Lower the print temperature

A print temperature that is too high can cause more filament to be melted than intended. This will cause the excess filament to flow out of the nozzle uncontrollably and ruin both the design and the quality of your 3D print. Reduce the temperature in a controlled manner in increments of five to ten degrees.
  • Set the correct diameter of the filament

Before you start printing, you must adjust the 'machine settings' of your 3D slicer software to the diameter of the relevant filament. Filament is available in standard diameters of 1.75mm and 2.85mm but sometimes deviates from this. Check the diameter by measuring a piece of the filament at approximately ten points with a digital caliper or analogue caliper. This is best done by laying the filament in at an angle. Do not press the vernier caliper too hard to avoid erroneous measurements. You enter the average of these results in your slicer software for an optimal result, without over-extrusion!
  • Use the right nozzle

The standard nozzle size used on 3D printers is 0.4mm. However, if you want to create extremely detailed prints, use a 0.2mm or 0.15mm nozzle. The print speed is lower in this case, so the print takes more time. Don't forget to adjust the nozzle settings in your slicer software to avoid over-extrusion.

Have you checked, adjusted and optimised all these settings? Then you can get started with your next 3D print without over-extrusion!

  Back to the 3D printing help centre
Back to all 3D printing problem FAQs

May also be helpful: